A little kitchen know-how
How to make cannabis edibles at home.
Brownies may get all the attention, but homemade edibles can be cookies, creamy mac and cheese, or something as simple as buttered toast. Start with food you already love.
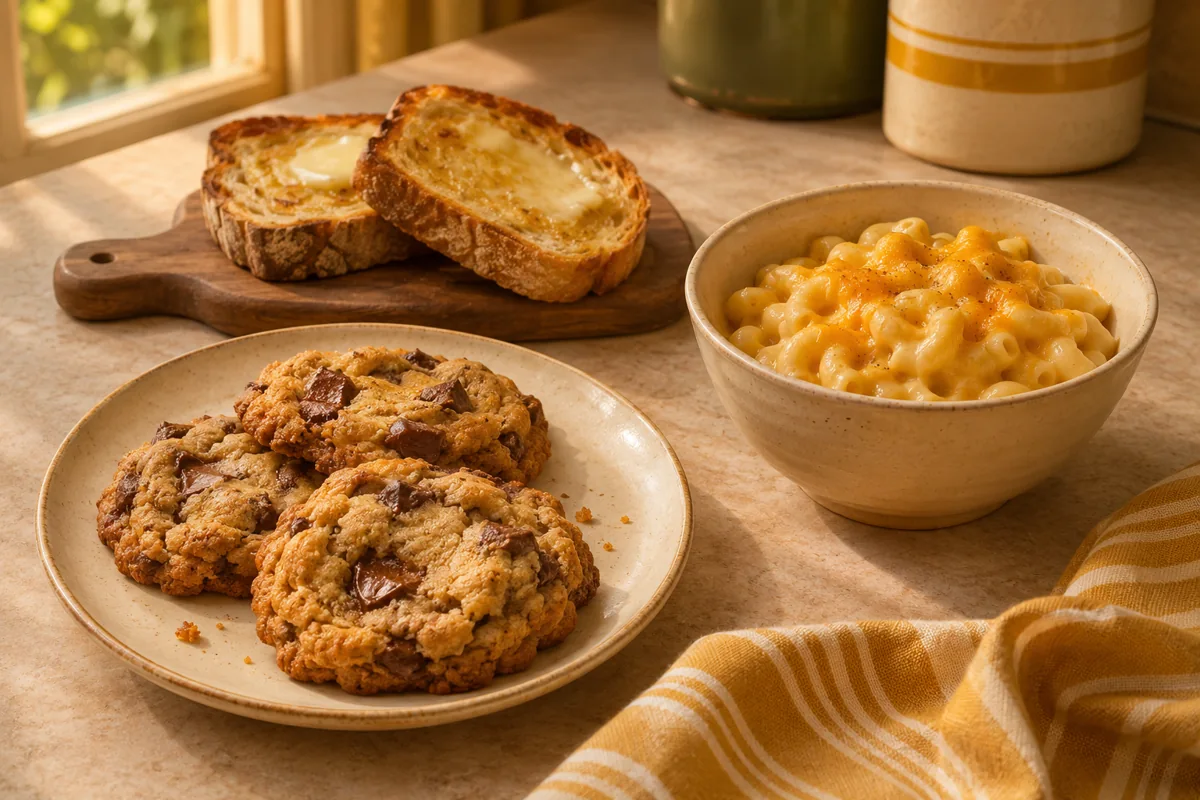
The first step depends on what’s in your kitchen. Have cannabis flower? You’ll need to prepare it before cooking. Have cannabutter or an infused cooking oil? You can start with a recipe that uses it.
We’ll walk through preparing your cannabis, choosing a recipe, and figuring out how much infused butter or oil to use. Along the way, we’ll explain the terms, the measurements, and the common mistakes that can leave you with disappointing food—or a stronger batch than you expected.
How does cannabis become an edible?
For many homemade edibles, the cannabis goes into the food through butter or cooking oil. You prepare the infused butter or oil first, then use a measured amount in your recipe.
Think chocolate chip cookies: cannabutter takes the place of some of the regular butter. The rest of the ingredients still have their jobs to do. The flour gives the cookies structure, the sugar adds sweetness, and the chocolate chips remain non-negotiable. Mostly.
You don’t have to make the infusion yourself. Already-infused cooking products can save that preparation step. What matters is knowing what you’re using, how much belongs in the recipe, and what you know about its strength.
Let’s start with what you have.
What are you starting with?
Cannabis flower needs some preparation before it goes into your food. For the butter and oil methods in this guide, you’ll heat the flower first—a step called decarboxylation, or “decarb”—then infuse it into your chosen butter or oil and strain out the plant material. We’ll walk through those steps below.
Cannabutter or cannabis-infused cooking oil has already been prepared. Choose a recipe that uses the same kind of butter or oil, then work out how much infused butter or oil to use. You can make up the rest with regular butter or oil to keep the recipe’s total amount the same.
A ready-to-use infused product can also save you the preparation work. Check the label for its ingredients, THC content, and directions. Products vary, so don’t assume the amount you used from one jar will be right for another.
Tinctures and concentrates need a closer look. Some are ready to use; others need further preparation, and their ingredients can affect how they mix into food. Follow instructions for that specific product rather than treating it like cannabutter.
Starting with flower? Here’s what happens before the mixing bowl.
Starting with flower: prepare it before you cook
Before you make the cookies, sauce, or brownies, you’ll turn your cannabis flower into an ingredient you can measure into the recipe. For the methods we’re covering, that means heating the flower, infusing it into butter or oil, and straining.
- 01ActivateHeat the flower first.
- 02InfuseCombine with butter or oil.
- 03StrainSeparate the plant material.
- 04CookMeasure into your recipe.
First, activate the flower
You’ll often hear this called decarbing. The full name is decarboxylation, but you don’t need to pronounce it to understand what it does.
Cannabis flower contains THCA, which heat converts into THC—the compound responsible for the high. That’s why preparing flower for THC edibles usually includes a heating step before infusion. The CDC explains this conversion.
For an oven method, you break the flower into small pieces, spread it evenly on a baking tray, and heat it for the time and temperature specified in your instructions. Use a timer and, if you have one, an oven thermometer to check the actual temperature.
The temperature and time belong together. If you follow a method that uses a lower temperature for longer, don’t borrow the shorter baking time from a hotter method.
Using Original Potency Booster? Follow the activation directions on your jar. Making conventional cannabutter or infused oil? Follow the decarb instructions provided with that method.
Once the flower is prepared, it’s ready for the butter or oil.
Next, infuse it into butter or oil
Infusion transfers cannabinoids from the prepared flower into the butter or oil you’ll cook with.
Choose your butter or oil with the finished recipe in mind. Making cookies that call for butter? Cannabutter is a straightforward starting point. Making an oil-based cake or a dressing? An infused cooking oil may suit it better.
Combine the prepared flower and your chosen butter or oil, then follow your infusion recipe’s heating instructions. The amount of cannabis, amount of butter or oil, temperature, and time all matter. Keep the heat at the level the method calls for; turning it up isn’t a reliable shortcut.
When the infusion is finished, strain it through a suitable food-safe strainer or cloth into a clean, heat-safe container. This separates the butter or oil from the plant material.
Then measure how much strained butter or oil you have. If you started with a cup, you may recover less because some stays in the flower and cloth. Use the amount you actually collected when estimating the infusion’s strength.
Label the container with what’s in it and the date. Keep your preparation notes too: which cannabis you used, its listed strength, how much you added, and how much finished butter or oil you recovered. Those details will help when you’re ready to calculate an estimate for your recipe.
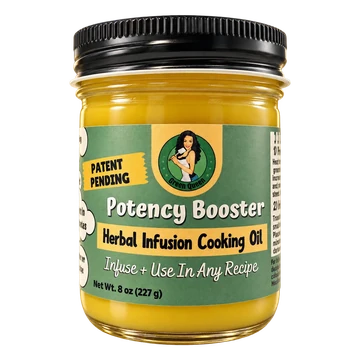
Your infusion, simplified.
Original Potency Booster is our cooking-oil blend for homemade cannabis infusions. Follow the jar directions to prepare your flower, then infuse for 20 minutes. Our recipes include a Potency Booster option with the amounts already worked out.
Meet Original Potency Booster →Your infusion is ready. Let’s make something good.
Choose a recipe that tells you how much butter or oil to use and when to add it. For your first batch, a familiar recipe makes it easier to focus on the cannabis part without learning a whole new dish.
Your infused butter or oil replaces some or all of the regular butter or oil in the recipe. It isn’t an extra ingredient poured on top.
If a recipe calls for four tablespoons of butter, for example, you could use one tablespoon of cannabutter and three tablespoons of regular butter. You still have four tablespoons total. How much should be infused depends on its strength and the number of portions you’re making.
Changing butter to oil is a separate decision. They behave differently in baking, so look for a recipe with an oil option instead of assuming the same amount will work.
Our creamy mac and cheese recipe shows how this works. Choose your butter or oil option in the recipe card, and the ingredient amounts and instructions update together.
How much THC will be in each serving?
The amount of butter or oil tells you how much belongs in the recipe. Its strength tells you how much THC you’re adding. You need both to estimate the amount in each serving.
Using a labeled infused product? Check how many milligrams of THC it contains per teaspoon, tablespoon, or other listed measure. Multiply that by the amount you’re adding, then divide by the number of portions.
For example, suppose an oil contains 5 mg THC per teaspoon. Two teaspoons would add 10 mg to the whole recipe. Divided into four equal portions, that works out to an estimated 2.5 mg per portion. That’s an example of the calculation, not a suggested serving.
Made your own infusion? You probably don’t know its strength per teaspoon—and that’s okay. Start with your preparation notes: the amount of cannabis, its listed THC percentage, and how much strained butter or oil you recovered. Our calculator can use those details to estimate the strength of your infusion and the amount in your recipe.
Homemade calculations are estimates, not lab results. Mix the infusion thoroughly into the food and divide the finished batch into equal portions. Cutting eight brownies instead of four changes the estimated amount in each brownie, even though the total in the pan stays the same.
Save the leftovers. Label them first.
An infused cookie can look exactly like an ordinary cookie. Before you put your batch away, clearly label the container “Contains cannabis.” Add the date, portion size, and estimated THC per portion if you’ve calculated it. Keep the word “estimated” on homemade calculations.
Store edibles separately from regular food, in a locked container out of sight and reach of children and pets. That includes anything going into the fridge or freezer. A label helps people recognize what’s inside; secure storage helps prevent someone from eating it accidentally. Health Canada’s storage guidance
Follow the storage instructions for the food you made. Mac and cheese needs refrigeration; cookies may have different storage needs depending on their ingredients. Refrigerate perishable food within two hours—or one hour if the temperature is above 90°F. FoodSafety.gov’s food-storage guidance
If you freeze individual portions, label each package before it goes in. Future you should know what’s for dinner without having to reconstruct the recipe.
A few good questions
Do I need an infusion machine to make edibles?
No. You can use an oven and stovetop method with ordinary kitchen equipment. Depending on your method, you’ll need a baking tray, saucepan, measuring tools, a food-safe strainer or cloth, and a heat-safe container.
An infusion machine is an optional convenience. If you already have prepared cannabutter or infused cooking oil, you can skip the infusion equipment and go straight to your food recipe.
Will homemade edibles taste like cannabis?
They can, especially when made with flower-infused butter or oil. How noticeable it is depends on your infusion, how much you use, and the other flavors in the dish.
Choose a recipe you’ll enjoy eating, and don’t rely on flavor to judge strength. A strong cannabis taste doesn’t tell you how many milligrams of THC are in a serving, and a mild-tasting edible can still be potent.
How long do homemade edibles take to kick in?
You may begin feeling effects within 30 minutes to two hours, but the full effects can take up to four hours. Eating more because you don’t feel anything yet can lead to taking more than intended. Give it time rather than treating the first hour as a verdict on your baking. Health Canada’s guidance on edible effects
Keep regular, non-infused food available if you’re hungry, and don’t drive after consuming cannabis.
A question on the menu?
Ask away. There’s room for a little kitchen conversation.